Have you incorporated feature rings with complicated designs like the one here into your woodturning? It’s not that complicated. Here’s how:
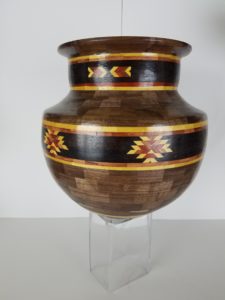
-As all segmented woodturners know, each ring is made of several individual segments glued together. The feature ring in this vase has 8 segments. Normally, each of the segments in an eight sided ring, like the ring below on the left, are cut at 22.5 degrees on each side. Extending each segment to the center of the ring, like the pie on the right, we can see that each segment gets narrower when moving toward the center.
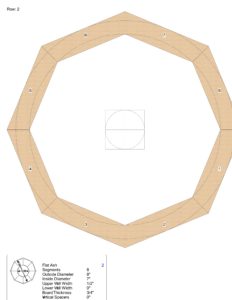
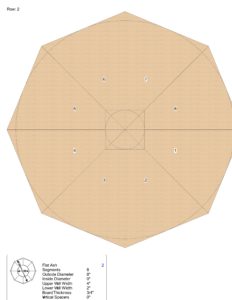
Consequently, if we cut into the segment with the featured design, we would be cutting into the design itself, ruining it. To solve this problem, start with a four sided ring like this.
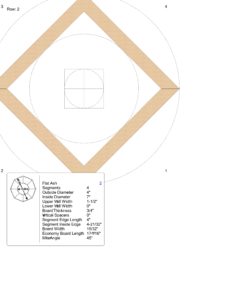
Each of these segments is about the same length as the segments in the eight sided ring but they are cut at a 45 degree angle. The 4 segments with the featured image are then cut into rectangles are alternated with the four that are cut at 45 degrees making an eight sided ring again. This way, we never cut into the design.
MAKING YOUR OWN IMAGES
This design was created using a program called Lamination Pro. Each of the steps for this design are listed below. To make your own designs you will need the Woodturner Pro package. Even if you do not plan on making designs like this but you are making segmented woodturnings, I would highly recommend Woodturner Pro to make your planning simple and fast.
Step One:
Lamination:
- Strip 1: 1/8″ Wenge.jpg
- Strip 2: 1/8″ Yellowheart.jpg
- Strip 3: 1/8″ Padauk.jpg
- Strip 4: 1/8″ Purpleheart.jpg
- Strip 5: 1/8″ Padauk.jpg
- Strip 6: 1/8″ Yellowheart.jpg
- Strip 7: 1/8″ Wenge.jpg
Width of repeating units: 0.937
First Generation
To make the 1st Generation:
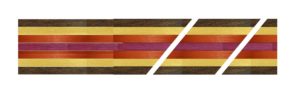
Cut the laminated board into 15/16″ strips at 45 degrees. Flip the left-hand strips top-to-bottom.
Width of repeating units: 1.87
 Second Generation
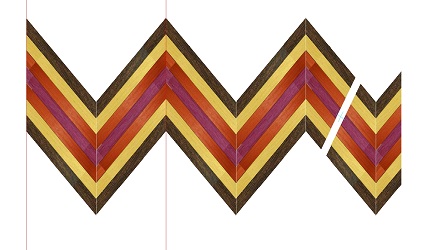
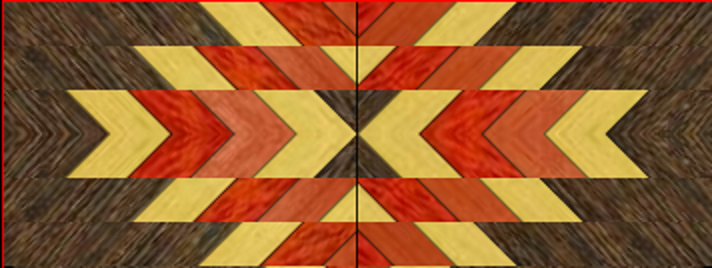
To create the southwestern design, make a center kerf that is 0.5″ (12.7mm) wide. Make 3 strips on both sides of the center kerf that are 0.125″ (3.175mm) wide. Slide all top strips by one-half of a repeating unit. Flip each strip of the SW design from top to bottom.
Cutting Instructions: To remove the center strip (drawn in blue): The width of your board should now be 2.19”.
Set the table saw fence 0.87” from the blade. Cut board twice with jagged edges against the fence.


Thanks for your personal marvelous posting!
I quite enjoyed reading it, you may be a great author.I will be
sure to bookmark your blog and will eventually come
back down the road. I want to encourage yourself to continue your great job, have a nice afternoon!
wonderful issues altogether, you just gained a new reader.
What would you recommend in regards to your post that you simply made
a few days in the past? Any sure?
Hi there, I found your website via Google while searching for a related topic, your website came up, it looks great. I have bookmarked it in my google bookmarks.